



Image Magic Printing • Artwork guide
Artwork Help & Print-Ready File Guidelines
Prepare artwork for printing with clear guidance on bleed, colour, image quality and file setup. Use this guide before uploading your files to Image Magic Printing in Malaysia.
Artwork support: what free checking means
Free artwork checking
Our artwork checking service helps you identify technical preparation issues before printing. It is a file-readiness check, not a complete design, editing or proofreading service.
When requesting a check, highlight the areas you need reviewed: file opening and format, artwork size and orientation, bleed and safe margins, image resolution, colour setup and fonts. For specialist finishing, confirm the required checks with our team.
A check cannot guarantee that every issue will be detected. Always review your final artwork yourself.
What you should not assume is included
- New design, layout redesign, logo tracing or image retouching.
- Copywriting, spelling, grammar, translation or factual verification.
- Recovering detail from low-resolution images or supplying missing fonts and assets.
- Checking every QR code, barcode, web address or variable-data record.
- Guaranteed colour matching, a physical proof or automatic corrections.
Ask us about any amendments you need. Confirm the scope and any charges before requesting additional work.
Prefer to design online?
The free DIY design tool is available on selected products where a design-online option is shown. Use the product's available template or canvas, and review the finished design before submitting it. Tool availability varies by product.
Prepare a print-ready file
| Setting | Recommended preparation |
|---|---|
| Size & orientation | Match the ordered finished dimensions, sides and orientation. Use actual size unless a reduced scale has been agreed. |
| Bleed & safe area | Follow the product template. Where none is specified, 3mm bleed and at least 3mm internal safe margin are general starting points to confirm, not universal production requirements. |
| Colour | For standard full-colour process printing, prepare CMYK artwork using the output profile required for the job. Confirm any special ink requirements separately. |
| Images | Aim for 300 pixels per inch (ppi) at final size for close-viewed print. Large-format work may use a lower effective resolution depending on viewing distance. |
| Fonts | Embed fonts in the PDF where licensing permits, or outline text in a copy of the artwork. Retain an editable original. |
| Delivery | Prefer a correctly exported print PDF. Inspect the exported file itself, not just the working document. |
Bleed, trim and safe zone
Trim is the finished cut size. Bleed is background colour or imagery extended beyond the trim edge to allow for small cutting variations. The safe zone is inside the trim edge and keeps text, logos and other important elements away from the cut.
For example, a 90 × 54mm finished design with 3mm bleed on each edge needs a 96 × 60mm artwork area. With 2mm bleed, the same design needs 94 × 58mm. Use the value specified for your product; do not add another bleed allowance to a template that already includes it.
Extend backgrounds naturally into the bleed. Do not stretch the entire design or add white borders to simulate bleed. Avoid thin borders close to the trim, because slight cutting variation makes them look uneven. Folds, binding, eyelets and other finishing may need larger clearances. Include crop marks only when requested, and keep them outside the bleed.
Colour mode and black text
RGB screen colours and some Pantone colours cannot be reproduced exactly with standard CMYK inks. Conversion can cause noticeable changes, especially in bright, fluorescent or highly saturated colours. Check the conversion before submitting and ask about colour-critical work.
For small black text and fine black lines in standard CMYK work, use C0 M0 Y0 K100 to help avoid coloured edges from registration variation. Large solid black areas may benefit from a rich-black mix, but confirm the recipe and total ink limit for the paper and process. Never use the Registration swatch for ordinary text or backgrounds.
Image resolution and large-format artwork
Resolution matters at the final printed size. A 300ppi image enlarged to twice its original width and height has an effective resolution of 150ppi. Changing a resolution label or upsampling does not restore missing detail. Keep logos, text and line art as vectors where possible.
For banners and signs viewed from a distance, roughly 100–150ppi at final size can be a useful planning range; close-viewed graphics may need more. Confirm the requirement for the material, output size and viewing distance. If preparing a file at 1:10 scale, 1,000ppi in the artwork produces 100ppi at full size. State the scale clearly and scale bleed and finishing allowances consistently with the agreed template.
Fonts, linked images and PDF export
Export directly from your design application using the print settings specified for the product. Preserve vectors, embed fonts and include the required bleed. Use PDF/X-4 or another PDF preset only where the production workflow supports it; do not assume one preset suits every job.
Open the exported PDF and check all pages, image detail, line breaks, symbols and font appearance. If supplying an editable file, include the linked assets and clarify font requirements. Outline text only in a duplicate, because outlined text is harder to edit.
Transparency and overprint
Inspect shadows, gradients, transparent objects and blending effects in the exported PDF. Do not flatten all artwork automatically: preserve live transparency where the agreed PDF workflow supports it, or use the requested flattening settings and inspect the result.
Use overprint preview and separation preview where available. Unintended overprint can change colours or make objects disappear; white objects set to overprint are a particular risk. Do not turn overprint on for every object. Dielines, spot finishes and black elements may need specific settings agreed with production.
QR codes and barcodes
Use a sharp vector QR code where possible, with strong dark-on-light contrast. Keep an unobstructed quiet zone of at least four modules around a standard QR code; a module is one small square in the code. Do not distort the code or place it across a fold, cut or curved area.
There is no single minimum size that works for every QR code. Data density, material, finish, lighting and scan distance all matter. Test a sample at actual printed size on several phones and verify the destination. Check barcode size and quiet-zone requirements for the relevant barcode type. Customers should verify that all encoded information and links are correct and remain active.
Folded artwork, booklets and specialist finishing
Folded leaflets & brochures
Use the correct flat-size template and identify the front, back, inside and fold direction. Roll-fold panels may need unequal widths to fold neatly; do not divide every design into equal panels.
Keep key text away from folds. Make a paper mock-up to check panel order and orientation. Keep fold guides on a separate reference layer or file unless the template specifies otherwise.
Booklets & bound documents
Unless instructed otherwise, supply individual pages in reading order in one PDF, not imposed printer spreads. Include intentional blank pages and confirm whether covers are supplied separately.
Saddle-stitched booklets normally require a total page count divisible by four. Other bindings have different requirements. Confirm cover setup, spine width, inner margins and creep handling before export; do not apply your own imposition or creep compensation unless requested.
Dielines & cutting paths
Use the supplied dieline at the correct size. Keep cut, crease and perforation paths separate from the printed artwork, with the exact spot-colour names, line weights and overprint settings specified by production.
Do not merge cutting guides into a JPEG or ordinary CMYK artwork. Provide a clearly labelled reference preview if needed, and confirm how production paths should be delivered.
Spot colours & special finishes
Foil, spot UV, white ink and other special processes require product-specific artwork instructions and must be confirmed as part of the order.
Keep required spot separations intact, using the supplied naming and layer conventions. Do not convert a finishing mask or cutting path to CMYK. A Pantone label alone does not mean a dedicated Pantone ink has been ordered or that a precise match is guaranteed.
Accepted files, upload limits and ordering
Preferred: PDF for most layouts; a high-quality JPEG can suit single-image artwork when it meets the product's specifications. JPEG cannot retain vector text, live transparency or spot-colour separations.
The existing accepted-format list also includes AI, EPS, PPTX, TIFF and DOC. Acceptance does not mean these files are automatically print-ready. Office documents can change layout or fonts when opened elsewhere; export and review a PDF where possible. Confirm suitability for editable files and specialist finishing before sending.
Exporting from the original application gives you more control than an online converter. Simply converting a document to PDF does not correct bleed, resolution, colour or layout problems.
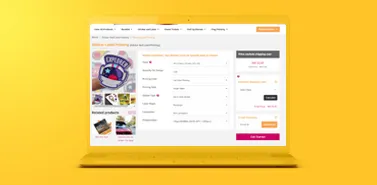
- Choose your product specifications. Check finished size, quantity, material, printed sides and finishing.
- Prepare and review your artwork. Follow the product template and open the final exported file.
- Upload or design online. Use the options available on the product page. If ordering multiple designs, clearly match each file to its order item and quantity.
- Review your order. Confirm contact details, artwork versions, delivery details and payment selections shown at checkout.
50MB upload limit
The artwork upload limit is 50MB. For larger files, select Upload Later where available and share a WeTransfer download link with your order reference by email to [email protected] or WhatsApp at 012-6512849.
Check that the link opens without an unexpected access restriction and remains available for retrieval. If Upload Later is unavailable or a file is rejected, contact us for guidance. Uploading or sharing a link alone is not confirmation that the artwork has been checked or approved.
File names and replacement artwork
Use clear names such as Order12345_Item01_BusinessCard_Front_v02.pdf and Order12345_Item01_BusinessCard_Back_v02.pdf. For a multipage file, identify the item and version in the filename and confirm page order. State the intended print scale separately for scaled artwork.
If replacing a file, identify both the old and new versions and contact us to confirm which file should be used. Do not assume a new upload cancels an earlier file or that changes remain possible once production has started.
Video guide: ordering your print job
The existing video provides a visual overview. Product options and screen labels may differ from the current ordering page.
Open the ordering video on YouTube
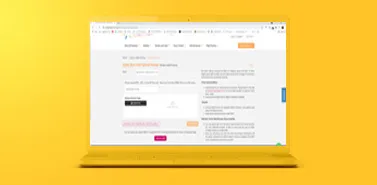
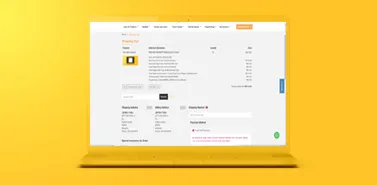
View the existing ordering screenshots
Reference images from the original artwork guide. Follow the current order page if its interface differs.
Final checks, proofs and colour expectations
Review content carefully: spelling, names, contact details, prices, dates, page order, front/back orientation, QR destinations and quantities for each design. Make sure you have permission to use the supplied images, logos and fonts.
If a digital proof is provided, check its content, layout and version before approving it. A screen proof is not a reliable physical colour standard and may not reproduce paper texture, sheen, white ink, foil or other finishes. Do not assume a proof or a physical sample is included with every order; ask about availability, scope, cost and timing if you require one.
Printed colour can vary with paper, printing process, finishing and production batch. Monitor brightness and calibration also affect how artwork looks on screen. Neither an ordinary screen preview nor a home-printer sample guarantees an exact match. Discuss brand-critical colours and suitable proofing before placing the job.
Technical artwork checking does not replace your review and approval of the content and intended result. If you identify an error after submitting, contact us promptly to establish whether a change is still possible.
Artwork preparation FAQ
Do all products need 3mm bleed?
No. Follow the selected product's template or confirmed instructions. Some products use different allowances. Bleed extends outside the finished cut size; the safe zone sits inside it.
Does free artwork checking include fixing my design?
Do not assume it includes corrections, redesign, retouching or proofreading. Tell us what help you need and confirm the scope and any charges for additional work.
Can I send artwork made in Canva, Word or PowerPoint?
Export a print-quality PDF where possible and inspect it for correct size, bleed, fonts and layout. A PDF export does not automatically make a file print-ready. Check available export settings and the product requirements.
Can a blurry image be made sharp by saving it at 300ppi?
No. Changing the resolution setting or enlarging a small image cannot recover original detail. Use a higher-resolution source or a suitable vector file.
Will the print match my screen or a previous order exactly?
An exact match should not be assumed. Screens, materials, finishes and printing conditions affect colour. Discuss colour-critical requirements before ordering.
Should I flatten transparency and outline every font?
Not automatically. Embedded fonts and live transparency can be suitable in a supported PDF workflow. Follow the required export settings and inspect the exported file; keep an editable original.
How should I send a booklet?
Unless instructed otherwise, send single pages in reading order, including intentional blanks. Confirm cover setup and binding requirements. Do not impose printer spreads yourself.
What if my artwork is larger than 50MB?
Use Upload Later where available, then send a WeTransfer download link with your order reference to [email protected] or WhatsApp 012-6512849. Contact us if that option is unavailable.
Can I replace artwork after uploading?
Contact us with the order reference and replacement filename. Confirm whether the change is still possible and which version will be used; a new upload alone does not confirm replacement.
Need help with your print artwork?
Send your order reference, product specifications and the issue you want checked so we can understand your request.